Here's another oldie, a NV series tandem pump from the famous Kawasaki,
full reference NV111DTR176R-R133AB-1. I could never get my hands
upon a technical catalogue of this series, so when this one appeared I
just had to gut it. This overhaul was one of those
super-hyper-mega-urgent ones, so I didn't get much time to take
detailed photos or come up with an accurate control schematics. But I
did manage to get the exact idea of how it functions.
On the pics you can see the adjustment points and
pilot connections. This is an open circuit axial piston tandem pump,
with a pilot gear pump/pilot pressure relief assembly mounted on the
back, so-o-o Kawasaki. The pilot pressure was set to 35 bar. Both pumps
have minimum and maximum displacement limiters, adjusted to
around 30cc min and 130 max. Total torque control is present (the
sum of both pumps), with separate adjustment on each pump. The front
pump has a proportional pressure reducing valve, with in and out ports.
The pressure signal supplied by it is used to override the torque
limiter settings, yet again so Kawasaki... The resulting pressure
signal is fed directly to the control valve of the front pump through
the body, if you want to use this function (torque setting override)
with the second pump you must connect the reducer's outlet with the
second pump's positive torque override line in (pic. 3).
Torque override is positive, the higher the signal pressure the higher
the torque limiter setting. Pressure reducer is positive too, the
higher the current the higher the signal pressure, fully open at around
500ma, with the threshold adjustment. Both front and back pumps have
negative proportional hydraulic flow controls (I prefer calling them
stroke limiter controls, as the torque control will override it when
necessary), 10-30 bar pilot range with threshold adjustment. The front
pump also has the two stage cut-off valve, limiting high pressure to
360 bar without pilot and to 220 bar with 20 bar pilot in. Of course
when the swashplate hits minimum displacement the cut-off stops cutting
off and the volumetric efficiency becomes the only pressure limiting
factor, so DON'T plug this baby's outlet...
Quite a standard open circuit assembly for mobile
applications. Not much to look at, but for me this particular pump was
a perfect example of the importance and value of knowing how to use and
apply back-engineering techniques when assembling complex hydraulic
components, in this particular case the pump controls. The thing is,
the pump came in DISSASSEMBLED. Some curious mechanic had already
gotten inside and after making quite a mess thought: Damn! That is too
many a piece!.. It's nothing like the washing machine I opened the
other day. Better let some other sucker deal with the shit! And then
sent it over.
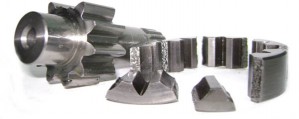
There were only THREE very small but very important pieces missing! Small spools like this one (pic. 5),
which get lost very easily by an inexperienced yet curious individuals.
Without those, the torque controls and the cut off valve wouldn't
function and pressure lines would connect to the pump casing causing
extreme pressure losses and overheating, should the machine operate. It
is on these spools (more like small rods, 3mm in diameter) that the
high system pressure actuates to move control spools.
Point here is that if the pump was merely
"assembled", without paying attention to detail, it would have cost
many downtime hours and labor wasted. It is a small victory for myself,
as I had never seen this particular control before in my life and still
was able to determine that there were parts missing, relying only on
common sense and knowledge of basic hydraulic controls.
I can absolutely guarantee you that (at least here
in Portugal) in most of the hydraulic workshops I know, the pump would
have been assembled, then tested (hopefully), then disassembled, then
something would have been done, then it would have been assembled
again, then tested, then disassembled, then..... You know the drill.
Remember the Matrix movie: everything has its
purpose. It is very important to consider every component in an
assembly from the point of "making sense". To do so all you need is
basic hydraulics knowledge and some brains. It WILL save you time,
effort and money!
A few words about Kawasaki. Great pumps, just
great. New series even better. Virtually bullet-proof. The only
drawback I can shoot is hundreds of o'rings all over the pump! When
they get old and dry the pump drips all over. Quite a job to replace
ALL of them too. There are quite a few most workshops will "overlook",
so there is always a risk of "tears" even after overhauling. Very good
quality aftermarket parts easily available. Keep it cool and the oil
clean and these pumps will last you a lifetime. It just had to be
Japanese to nail a nearly perfect pump!
P.S.
Kawasaki makes nice bikes too. Although I myself am
a Honda guy, and a proud owner of a beautiful silver CBF 600 N of 2004,
one of the last naked classics, with carburated engine for me to
"tamper with" and, of course, back engineer when necessary!